Harley Davidson V-Rod Forum banner

Removed 2nd inner baffle in 15 minutes!

6.6K views 41 replies 20 participants last post by  Bonejoy  
#1 ·
Hey, I just thought I'd share...

I removed the inner baffles from my stock pipes today. The first one took about an hour and a half, the second one took about 15 minutes!

On the first pipe, I used a 1 3/4" hole saw to seperate the front and I used a 1 3/4" hole saw to cut the back out.

On the second pipe, I used a 1 3/4" hole saw to seperate the front and I used a 3.0" hole saw to cut the back out.

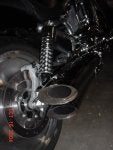
I used at wooden dowel to keep the hole saw centered and alinged for the exit cuts. Check out the pictuers.

Using the 1 3/4" hole saw to seperate the back of the first pipe was a mistake. I had to use a nibbler (and broke it) and then I had to used some small grinding wheels to enlarge the hole enough to remove the baffle.

On the second pipe, the 3.0" saw was the perfect size. After the cut the baffle slid right out.

The first picture shows the exit of the first pipe cut with a 1 3/4" hole saw.

The second picture shows the 1 3/4" hole saw with a 1 1/4" wooden dowel attached for centering...

The third picture show the exit of the second pipe cut with the 3.0 inch hole saw.

The forth picture shows the 3.0" hole saw with a 1 1/4" wooden dowel attached for centering...

The fifth picture show the nearly finished product. I have to do some clean-up...

The sound is awesome! This is the way the VRod should come stock... I cruised around the local mall and I set off a half dozen car alarms. It was way cool.

I know I'm running lean presently, but monday I'm going to have the "SE slip-fit flash" downloaded... Also, going to get a K&N air filter.

In the mean time I was thinking of adding some octane booster. Anyone have any thoughts on that?

Thanks for all the ideas, suggestions, and feedback out there.
 

Attachments

#2 ·
Nice Job! The difference in sound is alarming (excuse the pun)......

When I did mine, I finished them off by scuffing the ends and painting them with VHT paint. I wound up scratching mine while doing it and the paint covered the flaws nicely.

The ocane booster won't help you here. You need to enrich the fuel map which is what the re-flash will do. You ought to consider a fuel enrichment device from Gil or a Techlusion box. The advantage is it will cost you about the same or less than the flash and if you ever decide to switch pipes, you will already have the device and will only need to make adjustments. Whatever you do, do it soon!
 
#4 ·
Great! Thanks for the pics - worth a thousand words.
I have the SE slip ons now, and rode without the download for about 40 miles to get to the dealer. The nice thing was, I got to do a before, and after comparison which gives you a warm fuzzy that the download actually worked.. The download smoothed it out a little, and the bike really pulls nicely at 6K RPM.
 
#8 ·
good looking job.... I am one of those that screwed up the SE Slip ons..... all is not lost however... I will do some further work on the SE's and add Gil's box... then I should be in good shape....

way to go....
 
#12 ·
VrodG said:
I don't think anyone has posted this mod,my understanding all you need to do is remove the deflector plate from the inlet end. I'll know more when I get them in hand. I bought a set new in the box for $269.00 shipped to the house. :cheers:
Greg, The baffles in the slipons are very similar to the 16 Gauge except they're non-removable. If you look inside the inlet, you'll see the perforated tube (inner baffle) with a baffle plug (freeze plug) at the end. On the 16 Ga, the plugs are held in with 3 welds so you can't just punch it out. Even if you could, the plug won't fit through the outlet end. I think what you need to do is drill holes through the plug using a bell hanger bit (18" 1/4, 5/16 or as large as you can get) like the cable TV guys use. You then need to figure out how to grind the rest of the plug out so the outlet of the inner baffle in the same size as the baffle itself. The tough part is trying to find an arbor for a grinder that's long enough. If you could find an arbor for hole saw, that would be even better. To keep from getting shavings all over the inside, I suggest you work on it with the muffler vertical and stuff you shop vac hose around the muffler outlet. Can't wait to see what you figure out.
 
#15 ·
Danno.... I used a 1 1/4-hole saw... The ID of the adapter for the hole saw was to big so I ground it down so it would fit all the way to the plug. I used a socket and an extension with the end cut off so it would fit the drill, tape it all together with duct tape to keep this contraption from coming apart. :rofl:

The whole job after making the tooling is 5 MINUTES, I think this could be done on the bike and just start it up to blow the 2 metal plugs out. This is much easier than the stock mods, I have a extra set of stock pipes that I'm going to try the hole saw on both ends. I hope everyone can understand these direction if not drop me a line.
 
#16 ·
Nice Job Greg! I saw something the other day and should have posted info. I saw a drill bit extender that I think was made by Black and Decker or Irwin. It was about 12" long and had allen head set screws on the end to hold a drill bit. The other end just gets chucked up in the drill. Looked like it would work but your configuration was certainly cheaper!! Just not as pretty..... :rofl2:

After modding the stock pipes, I looked at the baffles and was wondering if I couldn't mod the pipes differently. Where the 2 inner pipes come together and form half circles, I think you could open them up on each end to allow the exhaust to flow straight through. the hole saw might work or you might need a metal burr with a long arbor and a die grinder. Did you notice this too once you got the baffles out??

Once complete, you should be able to look completely through the muffler and it would have much better flow with a completely stock look.

By the way, what do you think of the sound of the modded SEs compared to modded stock pipes??
 
#18 ·
I think you're right. Did the rest of my description make sense about how the inlet and outlet of the inner baffle are constructed as 2 half circles??
 
#20 ·
I too modded my pipes but a tad differently, I took a 1/4 inch drill bit and drilled holes all around the inside rim of the pipes doing so that the holes are nearly touching after completing this task take a chisel and finish connecting the drilled holes, then use a hammer to wahck the 15 pounds of crap out of the pipes,then a diegrinder to smooth out the pipes and some flat black paint to make em look perty. a ecm mod(ecm upgrade/powercommander is neccessary but the final product looks sweet. the entire pipe is open not just debaffled. oh yeah and loud as hell
 
#22 ·
I modded my pipes today. Sounds much better. I did notice when I pulled my baffles out, I could have used a much smaller hole saw for the rear, like a 2", maybe a 2 1/4". Seems they must have changed something, as mine did not have the big bulge on the baffles as I have seen in other pics. They were pretty much the same size all the way through. Other than that, everything worked fine.
 
#23 ·
PRVRT said:
I modded my pipes today. Sounds much better. I did notice when I pulled my baffles out, I could have used a much smaller hole saw for the rear, like a 2", maybe a 2 1/4". Seems they must have changed something, as mine did not have the big bulge on the baffles as I have seen in other pics. They were pretty much the same size all the way through. Other than that, everything worked fine.
Did you modded stock mufflers?
 
#24 ·
VrodG said:
Did you modded stock mufflers?

Yes they are stock on my 04 A. Just measured the baffles and they are just a touch under 2", 1 15/16". Maybe they changed the design somewhere along the line. Sounds good tho.